Snowy Days & The Malware Packing Ways
Table of Contents
A few weeks ago, I got the itch to start reversing some more malware samples to practice my reversing and analysis skills, however something I noticed while looking for a samples is: all malware samples are either obfuscated or packed. After around 30 minutes of frustration and confusion I gave up looking for a sample that isn’t packed or obfuscated. However the search got me interested in packers, it made me wanna know more about them and perhaps even how to defeat them. So I made this for my fellow newbies that are also really confused about the topic. :D
WARNING
This post is very heavy on theory, and a lotta reading is required lol. Also you should at least be comfortable with C/ASM and some disassembler and debugger. Additionally you should be comfortable with the PE file format.
Scope of the Post
This post will concentrate on basic compressors and crypters utilized by malware authors. We will explore the definitions of compressors and crypters, examine their functionalities, and discuss unpacking techniques. Additionally we will attempt to unpack a malware sample and develop a simple compressor/crypter in C for PE binaries.
Please note that this post will NOT address protectors in detail or the methods used to bypass any protective measures. This post will also NOT cover VM-Obfuscation and how to defeat polymorphic packers.
Packer Theory
What Even Is a Packer?
A packer is a utility used to compress and/or encrypt binaries in order to reduce their size, protect their contents or evade detections. The packer takes a binary (and sometimes a stub) as input and then generates a packed binary by taking the input-binary, compressing it and adding a decryption/decompression stub to the compressed binary. One of the most common packers is UPX (Ultimate Packer for eXecutables) at which we will take a closer look at later.
Types of Packers
Packers are usually categorized in one of three groups:
Compressors: Compress and package binaries to reduce their size and make them harder to analyze.
Crypters: Encrypt the contents of a binary to protect it from unauthorized analysis. They usually decrypt the code at runtime, making it difficult to analyze the original code without executing the binary.
Protectors: Compress and encrypt the contents of the binary to reduce size and to protect them from unauthorized analysis or tampering. These may include features such as code obfuscation, code-mutation, anti-analysis and outside the scope of malware, also license enforcement.
How Is a Packed Binary Generated?
As we already covered the packer usually consists of the packing software itself and the stub. The packer is responsible for generating the packed binary by compressing or encrypting the original binary and then giving that information to the stub that is then included in the final packed binary. The stub of course is then responsible for decompressing/decrypting and loading the binary.
However let’s take a closer look at the packing process that our packer goes through.

Now there are multiple ways of how a packer could pack the binary, the payload could be,
as seen above, placed in the .rsrc section. Other options are, that it gets placed in
other common sections such as .data or .text or we may have a designated special
section that holds our packed binary.
It’s also important to note that there are, from what I know, a few places where the unpacked code gets placed.
- Special section in the executable
- Self-Injection (some allocated buffer)
- Child-Process (a child process is created where the code gets injected in)
The graph above displays the simplest method of packing a binary and we will extend upon that technique below since it’s relatively easy to understand. So moving on, let’s clarify the diagram. After the packer opens the passed in binary, it first parses it to check if it is even a proper executable or some other junk. If it’s a normal binary, we proceed with the compression or encryption of the binary.
The compression, from what I have seen of open source packers, is usually done using zlib, however we can also find custom implementations of certain algorithms. The encryption is commonly done via the Microsoft’s cryptography library or something else like OpenSSL.
Finally we open the stub file and append the compressed/encrypted data into the .rsrc
section of the PE or whichever location the stub expects the data to be.
Techniques used by Packers
Of course our beloved packers have some dirty tricks up their sleeve, one of those is the usage of padding bytes. Padding bytes are junk bytes appended to the end of the binary that change every time the binary is executed. This is done so that the hash always keeps changing without any proper code mutation in place.
Moving on, sometimes there are anti-debugging and anti-reversing techniques to be found in packers, most commonly we can find debugger checks, VM checks and sometimes even attempts at removing software breakpoints (for more information, read here). To add onto these examples, for anti-reversing, we commonly find control-flow flattening, junk instructions and code mutation. Finally, when dealing with crypters, the packed binary may have the key hardcoded in the stub or at the end of the file.
Now a packer may use different techniques to know where the packed binary starts and ends. One of those is using some kind of markers, however those are not a smart move by the developer since those can be used as a signature.
Another way would be to save the size and offset in the stub or to save the encrypted binary in the EOF or the last section of the file. A few other options are in the “PE” and “.NET” resource sections, good old byte arrays or even one or multiple encoded strings.
Some crypters also usually store the decryption key or a keygen logic in the binary, typically the EOF, while others either bruteforce their own key or get the key from a remote server.
Packed Binary Execution - The Tale of The Stub
Starting off, it is important to note that when a packed binary is started we have 3 stages:
- Decompression Stage - decompression/deobfuscation process
- Loading Stage - mimicking of the executable loading process (like reflective loaders)
- Execution Stage - control is passed from stub to unpacked and loaded code

The stub is responsible for all the 3 stage, first it locates the resource in it’s resource section and then proceeds to start the decompression/decryption of the payload. After that it simulates the windows loader by essentially just acting like a basic reflective loader. Finally it passes the control to the loaded binary.
Stubs are usually written in either assembly (to be compact) or any other compiled language like C/Cpp. Additionally, as I mentioned before; the stub can be contained in the packer or may be a separate file if for example the packer supports the use of different stubs.
Although probably very rare, packers should always create unique stubs for every packed file to avoid signature detection, since if we use a stub that is already signatured by AV or EDR, the binary may get flagged. At the time of writing this part I have not yet looked at any such packers so I have no idea if there is even such thing as “polymorphic stub generation”. However I think it is a nice idea, and since it is so obvious, it is very likely that it has been done before.
Unpacking Theory
Detecting a Packed Binary
As silly as it sounds, before attempting to unpack a malware sample, we first actually need to determine if it even is packed. Easiest and fastest way to check is to check out the sections of the binary using something like PE-Bear. Usually packed samples have a huge section where the compressed code is located, however that is not enough proof. Another easy way is to check if the binary has unusual sections, for example weird names or sections that are larger in memory and take up almost no space on disk.
Other indicators may also be, but are not limited to:
- Obfuscated strings
- Big amount of “data” or “unexplored code” in IDA.
- No or only few imports.
- High entropy
- Specific APIs used like “VirtualAlloc” or “LoadResource”
An extremely common method to check whether a sample is packed or not is to use so called “Packer Identifiers” like “PEiD” and “Detect it Easy”. However it is important to understand that these tools are not always accurate and may give you false results. This is because they work by scanning the binary for common packer signatures, but those might as well be false positives.
Unpacking Techniques
Now that we know a sample is packed there are a few ways to go about this. BUT ALWAYS MAKE SURE YOU ARE DOING THIS IN A SAFE AND VIRTUALISED ENVIRONMENT!!! Anyways, we can use automated tools, use a webservice like unpacme, write our own static unpacker and finally we can unpack the sample manually using a debugger.
There are a few thing to ask yourself before launching that debugger:
- Is the sample REALLY packed?
- Is it performing self-overwriting, self/remote process injection or something else?
- Does the sample have an empty section that gets significantly bigger in memory?
- Are there any indicators of anti-VM or anti-debug techniques? If so, which?
After answering these questions we can proceed; Now if the sample has a section where it injects the payload into, the unpacking process could be pretty simple, we would simply need to open the memory map in the debugger and set a breakpoint for any execution that happens in that section. Now for anything else we wanna set breakpoints on commonly used APIs like:
VirtualAlloc(Ex)(only set it on the returnret 10)VirtualProtectWriteProcessMemoryResumeThreadRtlDecompressBuffer/CryptDecrypt- etc.
However few things to note, some packers may destroy the DOS/NT headers or the IAT (Import Address Table); or even zero out the OEP (Original Entrypoint). There can even be multiple or even fake binaries that are getting unpacked to trick the analyst and waste his time. To fix these we can attempt to rebuild the IAT and copy good headers from another binary.
Now for anti-debugging we can handle this by just using a plugin called scylla-hide OR by patching out the
nasty tricks. Additonally don’t forget to set up the debugger to ignore exceptions, since sometimes samples may
use exceptions to throw off debuggers.
And finally, we can…

Apologies for the bad joke. :P*
Do note though that if the sample doesn’t have any imports, it can either be because the IAT is destroyed OR because the sections aren’t aligned.
Import Address Trickery
Now when we dump the binary, from memory there are two thing to keep in mind.
- The Binary is still “mapped” so we wont be able to execute it again.
- The IAT may be destroyed or broken
For the first problem we may use the tool pe_unmapper to convert the virtual addresses to raw addresses. Though to fixing the IAT is a little more complex. Of course there are tools that can do this for us like “Scylla” but those may sometimes fail so it’s good to know how to do it yourself.
Finding the IAT
Obviously before attempting to fix the IAT, we need to find it first. This is simply done
by finding a function call to some external function and then jumping to that address (4 bytes). The address
is usually located in either .idata or .rdata, keep in mind another 2 things:
- X64dbg’s disassembler tries to disassemble these “opcodes” however it’s just function pointers.
- The sample may resolve its imports dynamically in which case you will have to watch out in the decompiler for custom implementations of
GetProcAddressandGetModuleHandle
Fixing the IAT
Now to finally fix the IAT, we need to find the start and end (end being the address after the last entry) of the IAT and then perform the following calculation to find out the size of the IAT.
$$\text{EndAddr - StartAddr = LenIAT}$$
Finally we just insert the start address of the IAT and it’s size in “Scylla” and click “Get Imports”. Easy as that. Now you can use your extreme programming skills to create a script to do this for you. :)
Note:
The IAT is just a array of function pointers in memory, so we can easily tell where the array starts and where it ends. Additionally we can find the size of the IAT in the optional header tho it may get deleted/tampered with so take caution. :)
Manually Unpacking A UPX Protected Binary
Now the following is gonna be a short overview on how I unpacked my first ever binary that is packed with UPX 4.2.4! To kick things off I created a small binary in C that displays a message box and packed it up tight like a present.

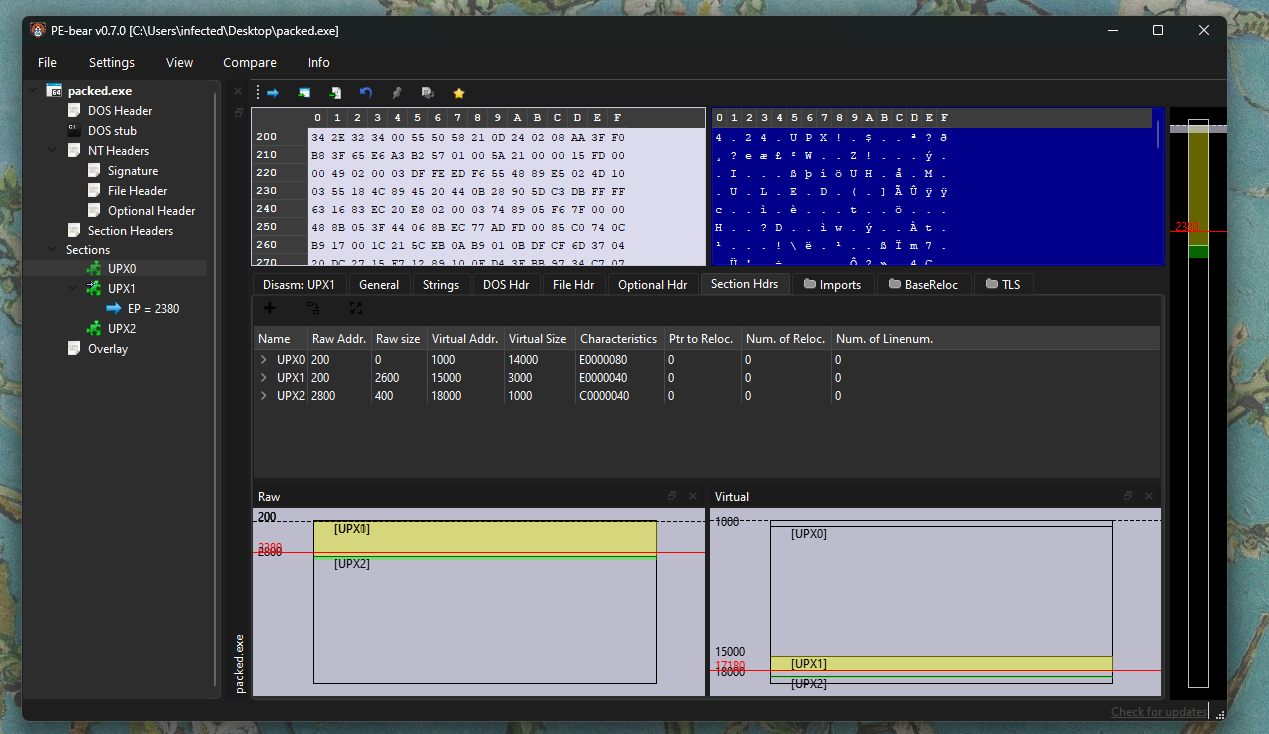
Next I dove into PE-Bear to confirm that the binary was in fact packed. After confirming that I took note of the UPX0 section that has the size 0 on disk but expanded significantly in memory.

So naturally during the unpacking procedure, the unpacked binary is very likely injected into the UPX0 section, allowing analysts to simply unpack it by placing a breakpoint for write or execute operations on said section. Below you can see a simple diagram on how the packed binary looks on disk and in memory:
DISK:
┌───────────┐      ┌─────────────────┐
│ PE Header │      │    PE Header    │
├───────────┤ -.   ├─────────────────┤
│   .text   │  |   │      Empty      │ <-- UPX-0
│  section  │  |   ├─────────────────┤ <-.
├───────────┤  }-> │ Compressed Data │   |
│   .data   │  |   ├ ─ ─ ─ ─ ─ ─ ─ ─ ┤   } UPX-1
│  section  │  |   │ Unpacking  Stub │   |
└───────────┘ -'   ├─────────────────┤ <-'
                   │  .rsrc section  │
                   └─────────────────┘
MEMORY:
┌─────────────────┐
│    PE Header    │
├─────────────────┤
│  Unpacked Data  │ <-- UPX-0
├─────────────────┤ <-.
│ Compressed Data │   |
├ ─ ─ ─ ─ ─ ─ ─ ─ ┤   } UPX-1
│ Unpacking  Stub │   |
├─────────────────┤ <-'
│  .rsrc section  │
└─────────────────┘
To make my debugging journey smoother I opened the binary in COFF explorer and disabled ASLR (Address Space Layout Randomization) in the optional headers. This tweak would save me some headaches later! :P

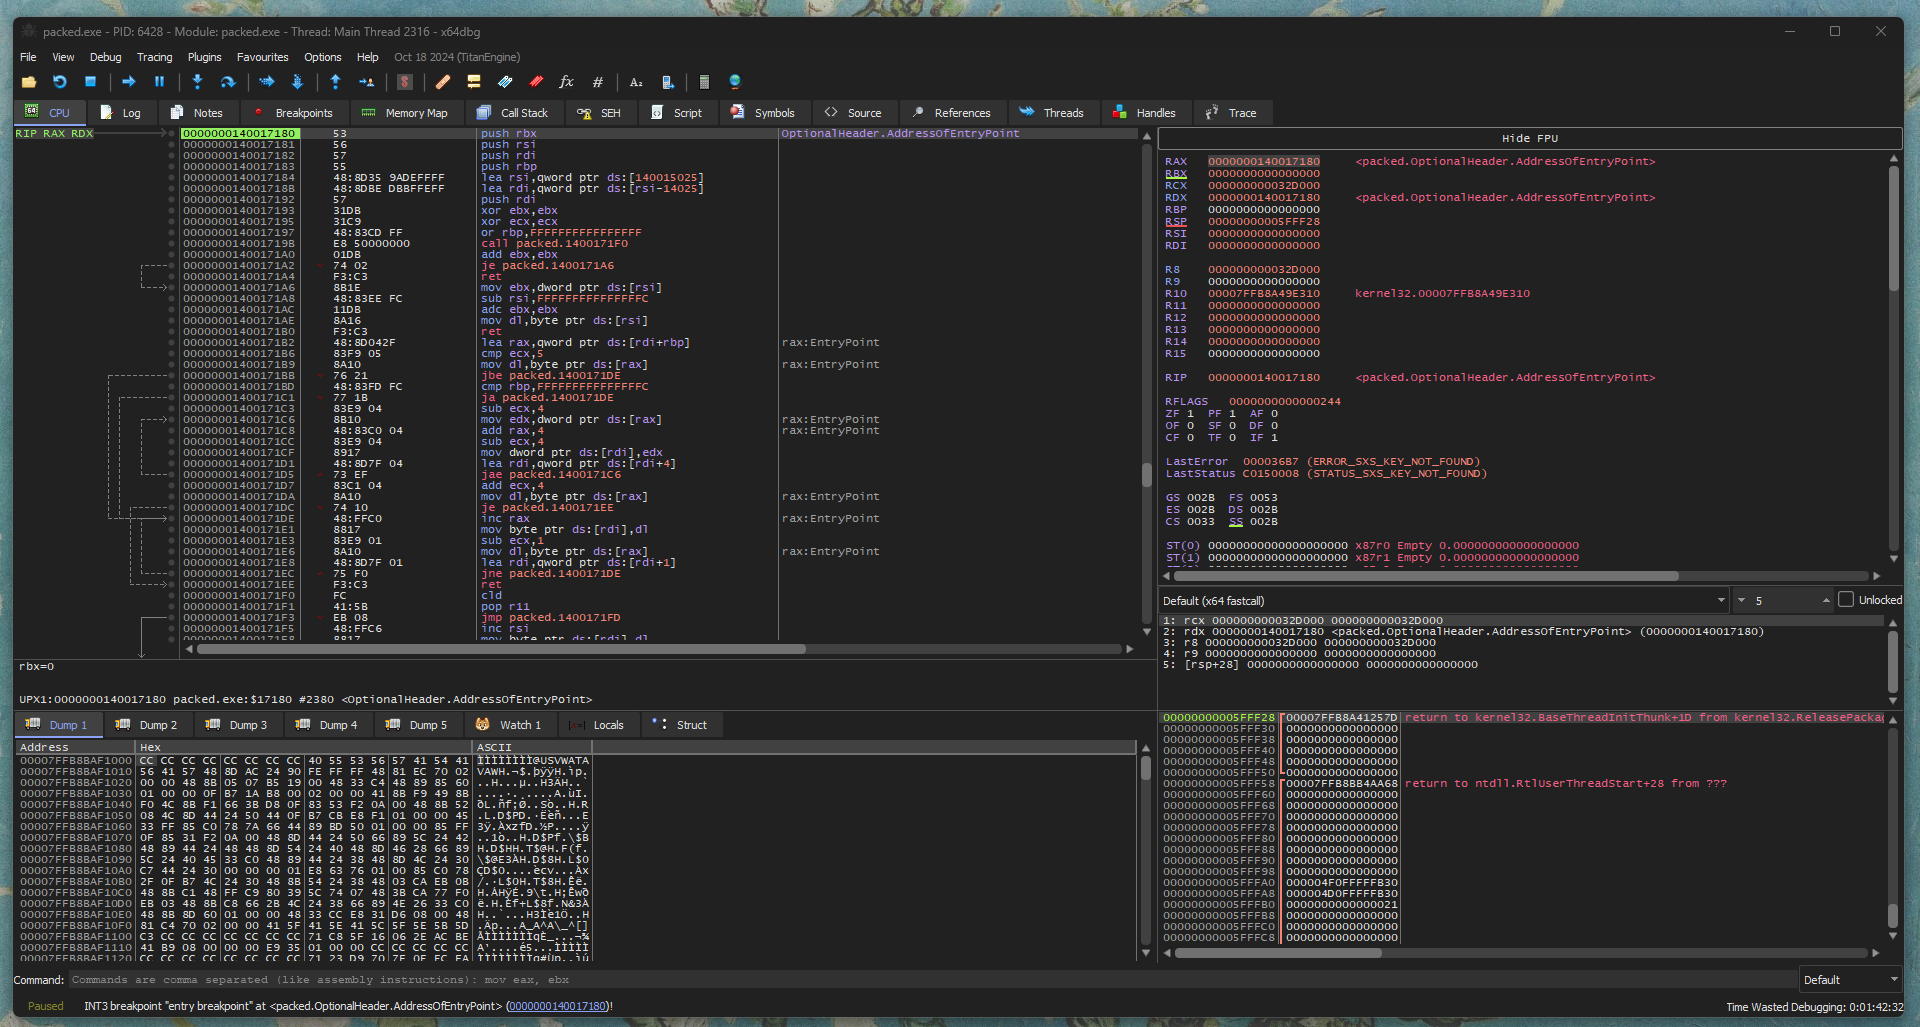
With everything set I threw the binary in x64dbg and let it reach the entry point. Once that was out of the way, I opened the memory map and looked for our UPX0 section and once found, I’ve set a hardware breakpoint to catch any write operations in the area.

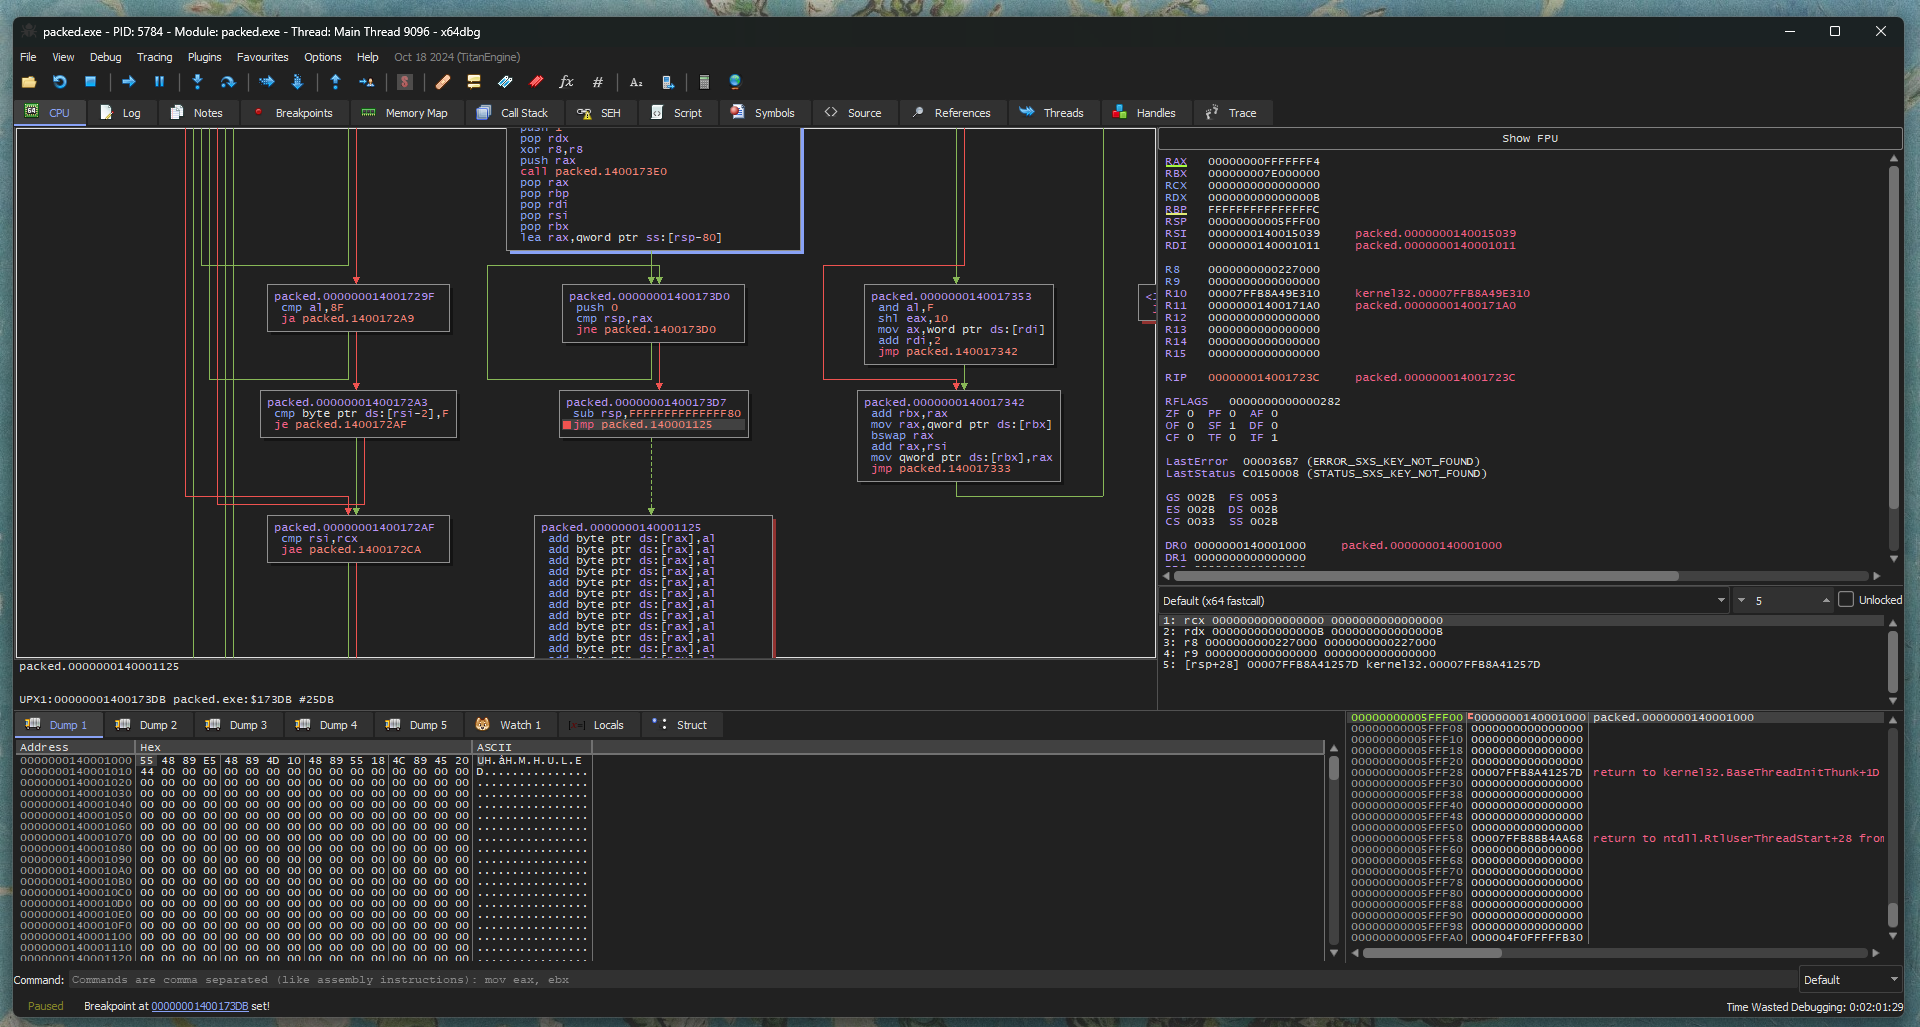
As I continue the execution the debugger stopped at my breakpoint and we can observe a byte being written in the dump. So, I switch over to the graph mode and look for any unconditional jumps! Finally, once found, I took note of the address it jumps to. That’s our OEP!!

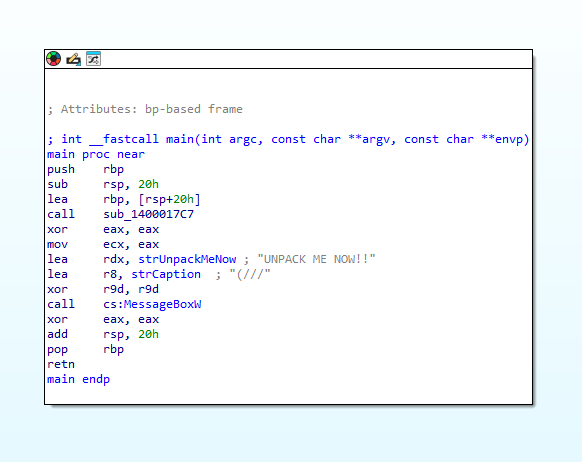
Finally I opened Scylla, found the IAT and dumped that bad boy (the binary… Not the IAT). Now since I am very lazy I will not fix the IAT for this example. Moving on I opened the binary in IDA and after a few seconds of searching we find our main!

Not fixing the IAT makes reversing painfully slow so don’t be like me here! :P
BONUS: Implementing a Simple Packer
Soo, now you learned about packers and want to implement your own? So you can pack your programs just like christmas presents, right? Well I gotchu!! Let’s first take a look at what really defines a good packer.
The Perfect Packer
In a perfect world a packer would have the following traits:
- Low entropy
- Small file size
- No dependencies
- No hardcoded key
- Support for multiple formats (PE, .NET, ELF…)
- Decrypts & Encrypts functions at runtime
Now, if you plan to support all of that, good luck (not saying it’s impossible, but it is a lotta work). Most if not all custom packers made by threat actors don’t fit in this criteria (good news for us analysts) so get that stuff out of your head. Another thing at the end of the day, every packer can and will be reversed and unpacked, it just takes time.
Snap Back To Reality
Anyhow, let’s proceed, we will be going over a simple packer I implemented in C so you get a better gist of how these things work. I decided to go with the easy route to not bore you any longer so what we will be going through is a tool that consists of two projects:
- The Packer
- The Stub
The packer will take a payload as input, compress it and store it in the “stub” executables .rsrc section.
Then the stub will attempt to locate, decompress and finally manually load our binary. Pretty easy right?
Well without further ado, let’s get started.
Packing And Wrapping The Gifts
The first step of course is to read our target file. We open the file, get its file size and read it into a buffer. (By the way for the sake of brevity I cut out the error handling of the code, so… don’t actually paste the code straight into your code editor. :P)
hFile = CreateFileA(argv[1], GENERIC_READ, 0, NULL, OPEN_EXISTING, FILE_ATTRIBUTE_NORMAL, NULL);
dwFileSize = GetFileSize(hFile, NULL);
pbBuffer = (BYTE *)VirtualAlloc(NULL,(SIZE_T)dwFileSize,MEM_RESERVE | MEM_COMMIT, PAGE_READWRITE);
ReadFile(hFile, pbBuffer, dwFileSize, &dwBytesRead, NULL);
After that is out of the way, we determine the size of the compressed buffer, allocate enough memory for the compressed binary and finally compress it. For this we use zlib however we can of course use anything else.
ulLenCompBuf = compressBound((SIZE_T)dwBytesRead);
pbCompBuf = (BYTE *)VirtualAlloc(NULL, (SIZE_T)ulLenCompBuf, MEM_RESERVE | MEM_COMMIT, PAGE_READWRITE);
compress(pbCompBuf, &ulLenCompBuf, pbBuffer, dwBytesRead);
Since the packer is a separate binary, we want to avoid always having to compile the binary. To achieve this
we create a copy of the stub binary and rename it to <target.exe>.infected.
iLenName = strlen(argv[1]) + strlen(".infected") + 1;
strNewFile = (char *)VirtualAlloc(NULL, (SIZE_T)iLenName, MEM_RESERVE | MEM_COMMIT, PAGE_READWRITE);
sprintf(strNewFile, "%s.packed", argv[1]);
CopyFileA("Stub.exe", strNewFile, TRUE);
Finally we finish the process by opening the new stub binary and updating its resources so they hold the packed binary and the size of the decompressed binary. The reason for saving the size of the binary is so the stub can later allocate enough memory for the decompressed executable.
hStub = BeginUpdateResourceA(strNewFile, FALSE);
UpdateResourceA(hStub, RT_RCDATA, "PACKED", MAKELANGID(LANG_NEUTRAL, SUBLANG_NEUTRAL), pbCompBuf, ulLenCompBuf);
LPVOID pSize = &dwBytesRead;
UpdateResourceA(hStub, RT_RCDATA, "SIZE", MAKELANGID(LANG_NEUTRAL, SUBLANG_NEUTRAL), pSize, sizeof(dwBytesRead));
EndUpdateResourceA(hStub, FALSE);
And that is it, onto the next, more fun part!
A Stub Is Born
At this point all we gotta do is find the darn compressed executable and its decompressed size, decompress it and finally load it. Again, I left out the error handling in the codeblocks to save some space since this post is already pretty long. So let’s jump in. First find the resources and lock them
hRsrcPayload = FindResourceA(NULL, "PACKED", RT_RCDATA);
hRsrcDecompSize = FindResourceA(NULL, "SIZE", RT_RCDATA);
pCompressedPayloadAddress = LockResource(hGlobal);
pDecompPayloadSize = LockResource(hGlobalSz);
Next up we allocate some memory to hold our compressed payload and for our decompressed payload.
szPayloadSize = SizeofResource(NULL, hRsrcPayload);
pCompressedPayload = VirtualAlloc(NULL, szPayloadSize, MEM_RESERVE | MEM_COMMIT, PAGE_READWRITE);
pPayload = VirtualAlloc(NULL, (SIZE_T)dwInflatedSize, MEM_RESERVE | MEM_COMMIT, PAGE_READWRITE);
And finally, we decompress the buffer and free the compressed buffer.
iStatus = uncompress(pPayload, &dwInflatedSize, pCompressedPayload, szPayloadSize);
VirtualFree(pCompressedPayload, 0, MEM_RELEASE);
By now most of the work is done. All that is left to do is to manually map the executable into memory, I assume you know how that works but if not I will give a short summary below:
- Allocate memory for the mapped executable using the value in
NtHeader->OptionalHeader.SizeOfImage. - Copy the headers to the allocated buffer from the decompressed binary with the size
NtHeader->OptionalHeader.SizeOfHeaders. - Next copy the sections over; we find the number of them in the file header and the rest of the needed information in the section header.
- After that we perform section relocations and resolve the imports of the binary. (horrors beyond my imagination (skill issue on my side…)).
- Finally, we calculate the original entry point with
(void*)((PBYTE)PeBase + NtHeader->OptionalHeader.AddressOfEntrypoint)and do the good old trick where we cast the pointer to a function pointer and call it like this((void(*)())OEP)().
Aaaand that should be it! Nothing too fancy, pretty basic, however there are tons of ways we can go about writing a packer and that’s also the beauty of it, we can be as creative with it as we want.
Homework Time!!
I have prepared a little sample packed with the little packer I made (to make it relatively easy), so as homework I want you to attempt to manually unpack the little sample I prepared. As always MAKE SURE YOU ARE RUNNING THE SAMPLE IN A VIRTUALISED AND SAFE ENVIRONMENT:
Download: hxxps://github.com/DeLuks2006/Malware-Analysis
Password: infected
Conclusion
I hope this lengthy post has helped you in some way in understanding how packers and crypters work and hope you now understand how to deal with those when coming across them in malware samples. Happy Holidays!!
As an additional exercise I’d suggest you pick out a random sample now and attempt to unpack it!
Credit
While researching these topics I have used many resources as a guide and asked many people for guidance to deepen my understanding of packers and how they work. Therefore I would like to thank those awesome people in this little section:
- Struppigel
- OALABS
- XyrisPack; also take a look the creators blog!
- Eversinc33 and his awesome packer-development workshop
- tmpvec <– Grammar Police No.1
- Ihor <– Grammar Police No.2
- Cinder <– Grammar Police No.3
Woah I really suck at grammar… T-T